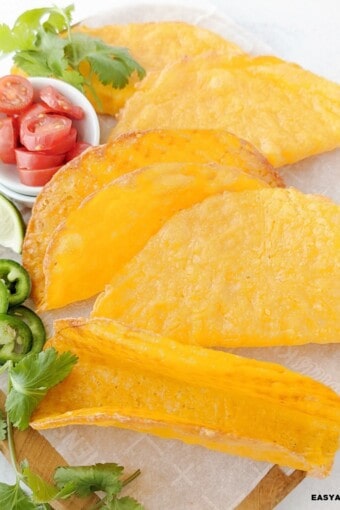
Keto Taco Shells
Equipment
- 1 oven
- 2 large baking sheet(s)
- 1 6-inch bowl and a sharp pencil to measure and draw circles.
- 1 Metal spatula to lift the cheese shells out of the parchment paper.
- 4 wooden spatulas as many as the number of taco shells you make.
- 8 same-height cans or glasses to elevate the spatula across them.
Ingredients
- 2 cups mild cheddar cheese shredded (If you prefer, replace it with sharp cheddar or shredded mozzarella, or any melting cheese)
Instructions
- Preheat the oven to 400 degrees F (200 degrees C). Line two large baking sheets with parchment paper.
- Use a ½ cup measurement to scoop out portions of cheese and arrange them in 6-inch circles on the baking sheets, with even thickness throughout. Make sure to leave some room (about 1-2 inches) between them because the cheese will melt and expand.
- Bake for 7-8 minutes, until bubbles start to form and the edges start to brown.
- Meanwhile, place long wooden spoons sitting horizontally across two cans or overturned glasses.
- Remove the baking sheets from the oven and allow them to cool for about 30 seconds to 1 minute, or just enough to lift them up without tearing them apart.
- Then, using a large metal spatula, gently lift each cheese circle and hang each over a wooden spoon for about 5-10 minutes, or until completely cool and hardened. If you want, use a paper towel to gently dab excess grease out of the surface of the hardened shells.
- Fill each keto taco shell with your favorite filling and garnishes. Enjoy!
Recipe Video
Recipe Notes
Nutrition
** Nutrition labels on easyanddelish.com are for educational purposes only. This info is provided as a courtesy and is only an estimate, since the nutrition content of recipes can vary based on ingredient brand or source, portion sizes, recipe changes/variations, and other factors. We suggest making your own calculations using your preferred calculator, based on which ingredients you use, or consulting with a registered dietitian to determine nutritional values more precisely.
Please note that health-focused and diet information provided on easyanddelish.com is for educational purposes and does not constitute medical advice, nor is it intended to diagnose, treat, cure, or prevent disease. Consult with your doctor or other qualified health professional prior to initiating any significant change in your diet or exercise regimen, or for any other issue necessitating medical advice.
