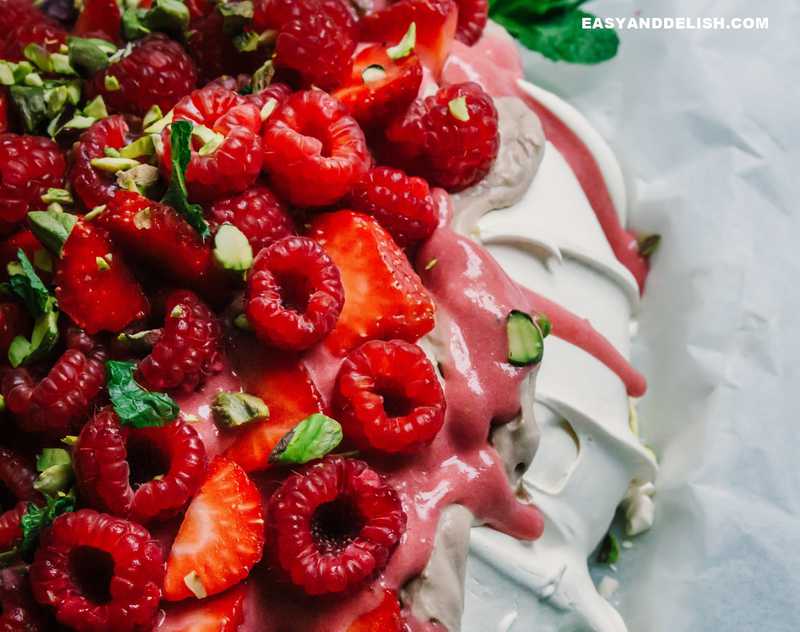
Find out how to make the Perfect Pavlova – with a step-by-step recipe and troubleshooting tips. Our gluten-free pavlova recipe calls for a classic meringue base topped with chocolate cream, raspberry curd, fresh berries, pistachios, and mint. It is a showstopper!
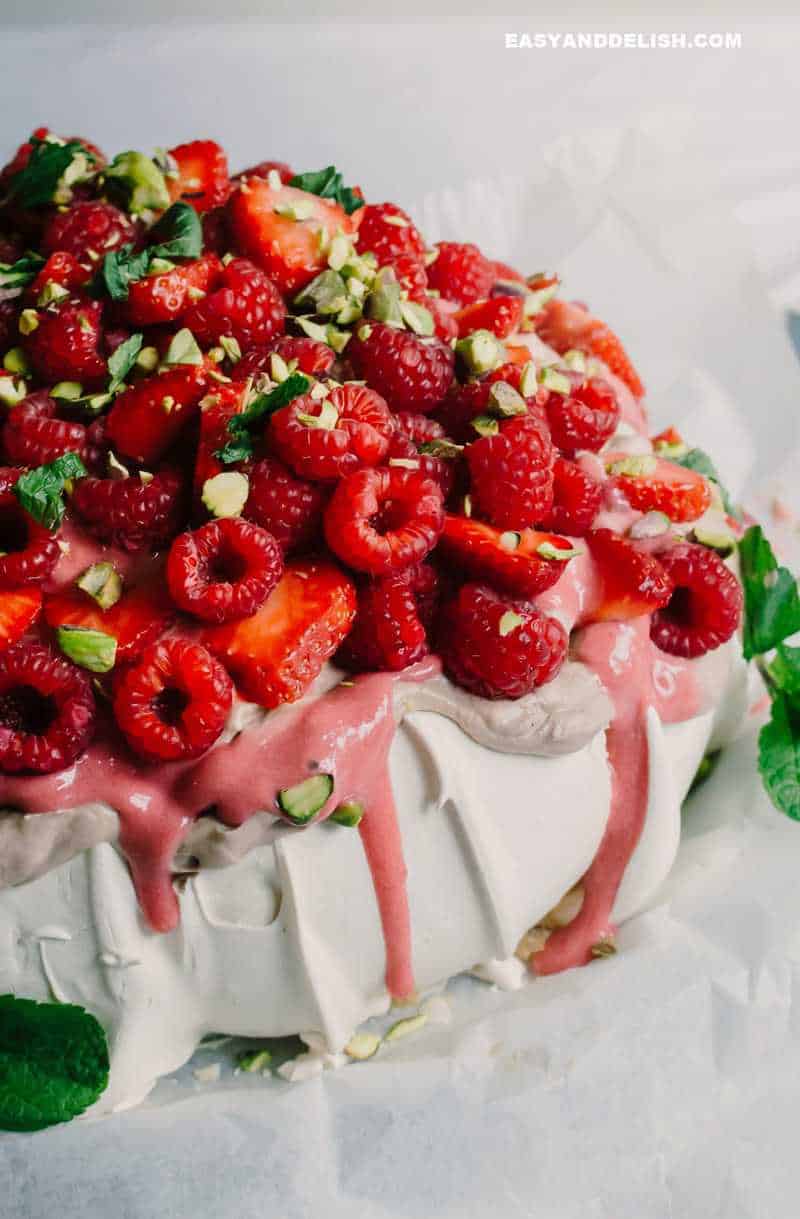
Pavlovas are magnificent desserts that demand some planning ahead, time, and of course, patience. But once they are ready, they are enough to make your eyes shine and your taste buds dance.
They are prepared mainly in the summertime or for the holidays. The classic base is the same, unless you choose to flavor it lemon, chocolate, or strawberry-- but the toppings can vary according to the time of the year.
Our pavlova with raspberry curd and chocolate cream is versatile. That means you can serve during the summer or for the holidays. Awesome, right?
Ready for the best pavlova ever?!
Table of Contents
- 1 REASONS TO MAKE THIS PAVLOVA RECIPE
- 2 WHAT IS A PAVLOVA?
- 3 MERINGUE VS. PAVLOVA
- 4 Needed Equipment:
- 5 PAVLOVA FAQ’s (TROUBLESHOOTING)
- 6 ABOUT THE INGREDIENTS
- 7 STEPS ON HOW TO MAKE THIS PAVLOVA RECIPE
- 8 HOW TO SERVE CLASSIC PAVLOVA
- 9 HOW TO FIX A COLLAPSED OR CRACKED PAVLOVA
- 10 VARIATIONS
- 11 Storage
- 12 Pavlova Recipe
REASONS TO MAKE THIS PAVLOVA RECIPE
- To ensure success, we are sharing with you a detailed step-by-step recipe and guide to mastering each stage of the recipe, including assembling.
- We also explain why to use certain ingredients instead of others, and the key steps to make the perfect pavlova.
- It’s the science of pavlova made easy-- so you can obtain the perfect pavlova dessert every single time you make it!
- But if your recipe fails, our post will help you understand what might have gone wrong and what to do with failed pavlovas.
WHAT IS A PAVLOVA?
Pavlova is a meringue-based dessert, considered to be one of several national desserts for both New Zealand and Australia.
Each of the two countries claims the dessert as their own.
The original pavlova recipe was created in honor of Anna Pavlova, a Russian ballerina, in the 1920s, when she was touring New Zealand and Australia. The idea was to craft a dessert that is so light and airy – just like a ballerina’s dance performance.
However, Anna Pavlova’s autobiographer has stated that the pavlova we know was created by a chef in Wellington, NZ when Anna toured the country in 1926.
Be aware that before then, there were a few dessert recipes that were called pavlova; however, in contrast to the modern airy, meringue-based pavlova, the European dessert was a more dense or torte-like cake.
MERINGUE VS. PAVLOVA
To start, pavlova is a meringue-based dessert, but not a classic meringue. Why not? Let's check out the similarities and differences between them.
Similarities: Meringue and pavlova are both egg-white desserts. Both require whipping egg whites into a foam, mixing in sugar, and then baking at a low temperature until dry.
Differences: However, the final result is different! Meringue is usually small and has a crispy and dry texture, while a pavlova can be small or large and is crispy on the outside, but has a soft, fluffy, somewhat marshmallow-like texture on the inside that melts in your mouth.
Moreover, pavlova is often topped with sweetened whipped cream (or chantilly cream) and seasonal fruits (and sometimes a curd).
BBQ and Christmas parties usually feature a seasonal pavlova in New Zealand and Australia.
Needed Equipment:
Here are a few tools needed to make our easy pavlova recipe:
- Stand mixer with a whisk attachment
- Mixer bowl – Copper, metal or glass. Avoid plastic bowls at all costs.
- Two spatulas – NO wooden spatulas. I like to use one spatula while the meringue is whisking, and the second spatula to transfer the meringue mixture to the parchment paper.
- Baking tray
- Parchment paper
- Offset spatula
- Clean glass bowls – To help separate egg whites from egg yolks.
- Clean measuring jug (preferably not plastic)
- Blender/food processor – only if you’re not using caster sugar. Blend granulated sugar until fine.
- Kitchen scale – to measure the ingredients
- Clean hand towels and paper towels.
All equipment must be clean and dry. Use the hand towels and paper towels to keep your hands clean and dry, as well as the equipment.
PAVLOVA FAQ’s (TROUBLESHOOTING)
Let’s find out some common mistakes that result in failures when making a pavlova recipe.
Why is my pavlova weeping?
This happens when liquid seeps out of the pavlova (i.e. “weeps”) -- either when the pavlova is cooling, or when it is baking. There is sugar melting out of the pavlova and it puddles at the bottom of the dessert, which can make it collapse and become soggy. Oh no!!!
Possible causes:
- High humidity –One of the easiest ways to avoid a weeping/collapsed pavlova is simply by not making one on humid days (or rainy days). Sugar in the pavlova will absorb water from the environment, causing the egg whites in the structure to not hold the sugar molecules that absorb water. The result? A collapsed pavlova. 🙁 Plus, avoid washing dishes or boiling water in the kitchen before, during, and after making a pavlova (or at least until the pavlova has cooled down completely and set). Doing this also helps reduce the humidity in the kitchen.
- Undissolved sugar– This is one of the most common mistakes people make. One MUST add the sugar SLOWLY (in 1 tablespoon increments) in order to dissolve well and also whisk it after every addition to make sure the sugar crystals are fully dissolved. What’s the result of any undissolved sugar crystals? A collapsed pavlova! Also, use caster sugar which dissolves more easily than granulated sugar.
- Over-beaten egg whites– When you over-beat the egg whites to a grainy texture (either before or after adding the sugar), the proteins in the whites may lose their structure. This will cause the egg whites to not hold onto the air and sugar that are being whisked into the foam. The result? A weeping/collapsed pavlova! If the beaten egg white becomes grainy, start again with fresh egg whites. Make sure to whisk the eggs on low or medium speed and only beat them until the sugar has fully dissolved (or until the mixture looks thick and glossy).
Why did my pavlova crack?
If your pavlova has cracks in it, it's because the soft center shrunk away from the meringue, causing the outer shell to crack.
Possible causes:
- Over-beaten egg whites –To make a meringue base, you have to whisk egg whites to a soft, foamy consistency. Then slowly add the sugar to be incorporated into the foam. The whisking process allows air to be trapped in the foam, as well as the sugar to be dissolved. But if the eggs are overbeaten, their proteins will break up, causing the structure to deflate and consequently, the pavlova to crack or collapse. Make sure to use fresh eggs, and whisk the egg whites on a lower speed.
- Baking in a too-hot oven and cooling too quickly –Pavlova must be baked slowly, at a low temperature. By doing so the meringue will expand slowly and get crisp and dry on the outside while keeping the middle at a soft, fluffy consistency. Otherwise, the pavlova will deflate when cooling down. Plus, do NOT open the oven during the baking process. Even if baking it in a low-temperature oven, it needs to cool down gradually in order to prevent any rapid temperature changes. If it cools down too quickly, the mallow center will shrink rapidly, causing the pavlova to crack or collapse. The best thing is to leave the pavlova in the oven to cool down.
- Weeping –A pavlova weeping will cause the soft middle to shrink in size, making the pavlova not only crack but become soggy. Follow the tips above for preventing a weeping pavlova!
Why is it brown (or not white)?
Here are some possible causes:
- Hot oven –The pavlova can caramelize and turn an off-white color if the oven temperature is too hot.
- Flavoring addition– Vanilla is not part of a classic pavlova but some people like to add it in order to offset an “eggy” taste. The thing is, it can cause the meringue to have an off-white color. and if the vanilla extract has water, it may cause the pavlova to weep as well. Oh oh! The solution is to simply add some lemon zest instead of vanilla extract. But make sure the lemon is completely dry before zesting.
Why is it soggy?
This happens to weeping pavlovas. To prevent this:
- Do NOT bake your pavlova on high humid or rainy days.
- Add the sugar slowly and make sure it’s fully dissolved at each step.
- Do NOT overbeat the egg whites.
Why is my meringue base runny?
Egg whites require clean, dry utensils so that they can be whisked into a stable foam. Any drop of water or fat (yolks or otherwise) can ruin the meringue. If this happens, you’ll wind up with a runny egg white mixture that never gets stiff.
To prevent this:
Make sure ALL your utensils are super clean and dry before making this pavlova recipe! That includes bowls, spatulas, beaters, etc. Plus, use copper, glass, or metal bowls instead of plastic bowls to beat the whites because plastic can cling on to fat molecules, which can contaminate the egg white mixture.
Why is my pavlova flat?
Here are a few reasons:
- You didn’t incorporate enough air into the egg white mixture. Avoid knocking the bowl on the counter, or knocking the bowl with anything. Also do NOT tap the baking tray once you shape the pavlova. This can deflate the meringue, leading to a flat pavlova. Plus, shape the meringue mixture on parchment paper the proper way.
- Your pavlova shrunk during the cooling process and deflated.
To prevent this:
- Whisk the egg whites until they are thick and glossy. If runny, the pavlova will become flat.
- Create furrows on the side of the pavlova with a small spatula, in an upward motion. This will help the meringue rise.
How far in advance can I make this pavlova dessert?
You can make meringues a few days ahead and store them in an airtight container. But the same is not true for pavlovas. Do NOT make them more than 24 hours in advance.
The best thing is to make the pavlova the day before you will serve it and then let it cool down in the oven completely. This may take at least 6 hours but can help prevent it from collapsing or cracking.
As for toppings, place the whipped cream, curd, and fruits only minutes before serving it. Why? Because as soon as you place on the toppings, the pavlova will start to get soft and soggy. But if course, you want the exterior to be crisp.
Why do you add cornstarch and vinegar to the pavlova?
An acid helps to stabilize egg whites as they foam up. If you don’t have white vinegar, replace it with an equal amount of lemon juice, or with half the amount of cream of tartar.
As for cornstarch, the combination of vinegar and cornstarch helps create a marshmallowy center. This sets the pavlova apart from classic meringue.
ABOUT THE INGREDIENTS
CHOOSING THE RIGHT EGGS FOR PAVLOVAS
Old vs. fresh eggs
Give preference to fresh eggs! Why?
Although older egg whites hold more air as they are whipped into a foam, creating more volume, they have a weaker protein structure. This means the air will escape more easily, and cause the dessert to deflate easily as well.
On the other hand , fresh eggs may not whip up as much as older egg whites, but the air that is whisked into it is far more stable. Their protein structure is stronger than that of older egg whites.
Room temperature eggs
The eggs must be at room temperature because cold eggs don’t whip as much as eggs at room temperature.
WHAT SUGAR TO USE
Sugar is one of the two main ingredients in a classic pavlova.
The best type of sugar is caster sugar. It is an ultra-fine sugar that dissolves more easily.
If you don’t have it at home, pulse regular granulated sugar in a food processor first to make it finer.
DO NOT use confectioner’s sugar. Why? Because it is NOT pure sugar (it has cornstarch mixed in) and will not create the best results.
STEPS ON HOW TO MAKE THIS PAVLOVA RECIPE

1. MEASURE THE INGREDIENTS
Weigh your ingredients.
Pavlova is a delicate dessert -- sensitive to just about any variation. Using precise measurements will help you in creating the perfect pavlova!
Each egg will have slight variations in terms of how much egg whites are in it. The amount of egg whites will also vary between different sizes of egg, and even between eggs in different countries.
But as a general rule, 1 large egg will weigh 2 oz or 57 g (56.7 g).
Each 2 oz egg usually has about 1.1 oz (30 – 32 g) of egg whites.
Our pavlova recipe uses 7 egg whites, which weigh 7.8 oz (221 – 225 g).
7.8 oz of egg whites in weight is about 225 ml.
Each egg white needs about 50 – 55 g of caster sugar to make a stable meringue.
The ratio I use is, for each 1.1 oz (30 – 32 g) of egg whites, use 1.7-1.9 oz (50 – 55 g) of caster sugar.
2. SEPARATE THE EGG WHITES AND YOLKS
Make sure your hands and bowl are clean and dry!
Separate each egg white from the yolk into a smaller bowl first. Do NOT allow even the tiniest drop of yolk, or any other water or fat, to be mixed in with the egg whites. Or they won’t whip properly.
After you separate them, you can then add to a mixing bowl for measuring. (SEE PIC. 1)
3. WHISK EGG WHITES
The whisking speed is key for a stable meringue base. Using a high speed may cause the pavlova to collapse as it bakes. Adding air too fast will increase the volume of the beaten whites faster, but it will also deflate the meringue quicker.
Using low speed is crucial! If your mixer has 10 speeds, never go beyond speed 4 for the whole duration of whisking the meringue. Only increase the speed to about 6 in the last 30 – 45 seconds (to mix the cornstarch and vinegar).
This will prevent the meringue from being over-whisked.
At first, whisk the egg whites at speed 3 or 4 until it reaches the soft peak stage (about 10 minutes). (SEE PIC. 2)
4. ADD SUGAR TO THE EGG WHITES
When the egg whites are at the soft peaks stage, you can add the sugar (about 1 – 2 tablespoon at a time), with 30 seconds between each addition. (SEE PIC. 3) The sugar must be almost fully dissolved before adding it again. Why?
- Adding too much sugar can deflate the mixture, resulting in a less airy pavlova.
- Adding sugar too fast without letting it dissolve first can cause the pavlova to weep after baking, making it soggy.
This process can take from 10 – 20 minutes, so keep the speed of the mixer low (3 – 4 speed).
5. WHISK TO MAKE THE MERINGUE
Once all the sugar is added, keep whisking it. The mixture will deflate slightly and look a little runny. But whisk it on speed 3 or, just until ALL THE SUGAR IS DISSOLVED, and the mixture looks glossy and thick. (SEE PIC. 4)
This can take as little time as 10 – 15 minutes (with caster sugar).
NEVER mix the meringue longer than needed.
To check if the sugar is dissolved: Take a little meringue to your fingertip and rub it between your thumb and index finger. If you feel any granules, then it needs more time to whisk.
6. ADD CORNSTARCH/VINEGAR SLURRY
Add it at the end, after all the sugar has dissolved, and then whisk it into the pavlova within 30 – 45 seconds, using the speed 5 – 6. But by all means, make sure there are NO LUMPS in the slurry before adding it.
7. PREP THE OVEN AND BAKING TRAY
Pavlova is baked slowly in a low heat oven to make sure it dries out. The oven is preheated to 300°F (150°C) but immediately lowered to 225°F (110°C) when you place the pavlova in the oven.
Use a regular baking tray lined with parchment paper which ensures the pavlova doesn’t stick to the tray once baked.
Draw an 8-inch (20 cm) circle on the parchment paper as a guide for the shape of your pavlova. It must be on the underside of the parchment paper, so that the pencil marks don’t get transferred onto the white pavlova as it bakes.
8. SHAPE THE PAVLOVA
Use a second, clean spatula to scoop out the meringue mix from the bowl.
Then use an offset spatula/spoon to spread the meringue out on the circle, with an even thickness and straight-ish sides. (SEE PIC. 5)
Once the basic shape of the pavlova is ready, use the offset spatula to create vertical furrows on the side of the pavlova while moving the offset spatula from bottom to top. Make sure to create soft edges and flatten any pointed meringue.
Swirl the middle of the pavlova as well to create a spiral furrow. Our pavlova is taller than the Mary Berry pavlova.
9. BAKE THE PAVLOVA AND LET IT COOL DOWN
Once the pavlova is shaped, place it right away in the center of the oven and reduce the oven heat to 225°F (110°C).
DO NOT OPEN THE OVEN while the pavlova is baking.
Once baked, let it cool completely in the oven as well.
After cooling, gently place the pavlova in an airtight container, in a dry room, until ready to serve it (no more than 24 hours).
10. MAKE THE CREAM AND CURD
Follow our recipe to make the raspberry curd (SEE PICS. 6 and 7) and also the chocolate cream (SEE PICS. 8 and 9).
They will serve as toppings for the pavlova. Add them right before serving (SEE PIC. 10); otherwise the pavlova dessert will become soggy!
HOW TO SERVE CLASSIC PAVLOVA
A classic pavlova recipe calls for toppings such as sweetened vanilla whipped cream (i.e. creme chantilly) and seasonal fruits. Kiwi is the preferred fruit in NZ and Australia, but you can use whatever is available.
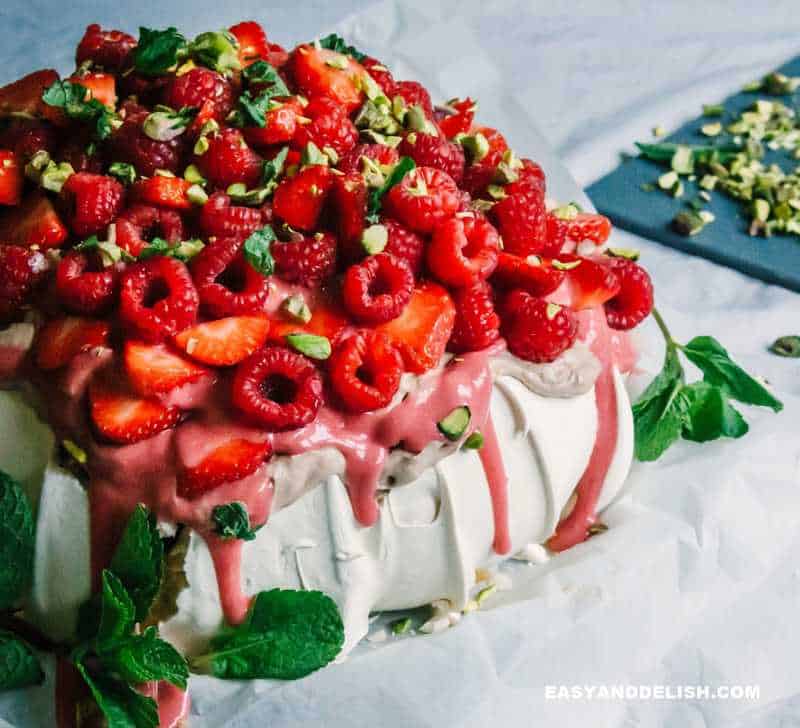
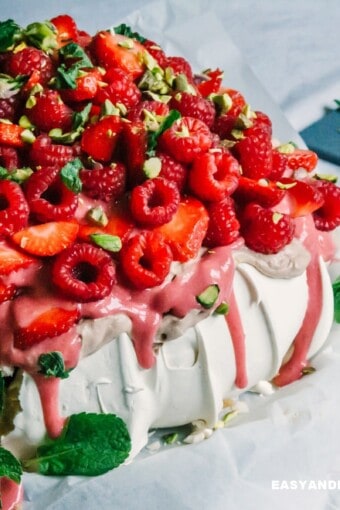
We served ours topped with chocolate cream, raspberry curd, and berries.
To keep the pavlova dairy-free, top it with sweetened whipped coconut cream.
Other fruit toppings:
- Classic fruit toppings – Kiwi, passion fruit, mangoes.
- Berry toppings – strawberries, raspberries, blueberries, blackberries (and other berries).
- Drizzle lemon curd, along with other fruits on top.
- Other sweet but tangy fruits – currants (red, white, or black), starfruit, peaches, plums or other stone fruits, pomegranate, etc.
HOW TO FIX A COLLAPSED OR CRACKED PAVLOVA
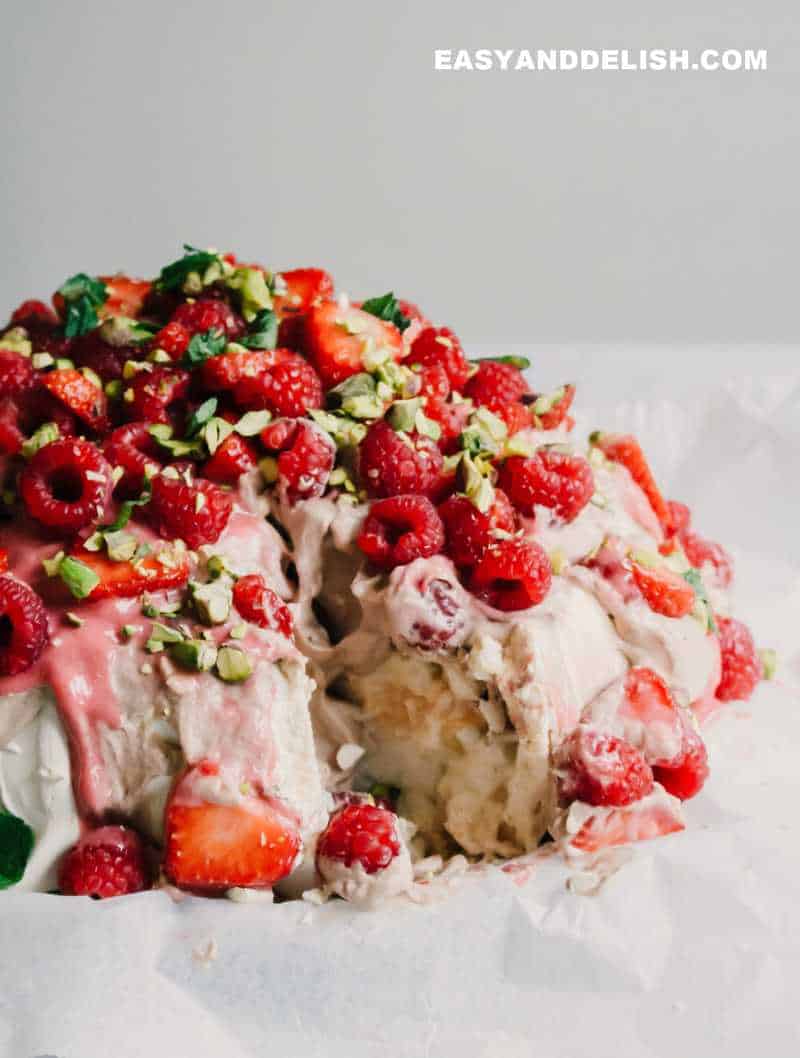
If your pavlova collapsed a little in the center and on top, you can still serve it as long as it’s not weeping. Just top it with whipped cream and no one will notice it.
Even if it cracked to the point that you don’t want to serve it, just chop up the pavlova before serving and fold in some whipped cream and the fruits that you were going to use. It will be like an eton mess! (or a trifle)
What to do with the leftover egg yolks?
- Make quindim, fio de ovos, Portuguese egg tart, or queijadinha.
- Make more fruit curds!
VARIATIONS
You can use the basic pavlova recipe to make variations such as:
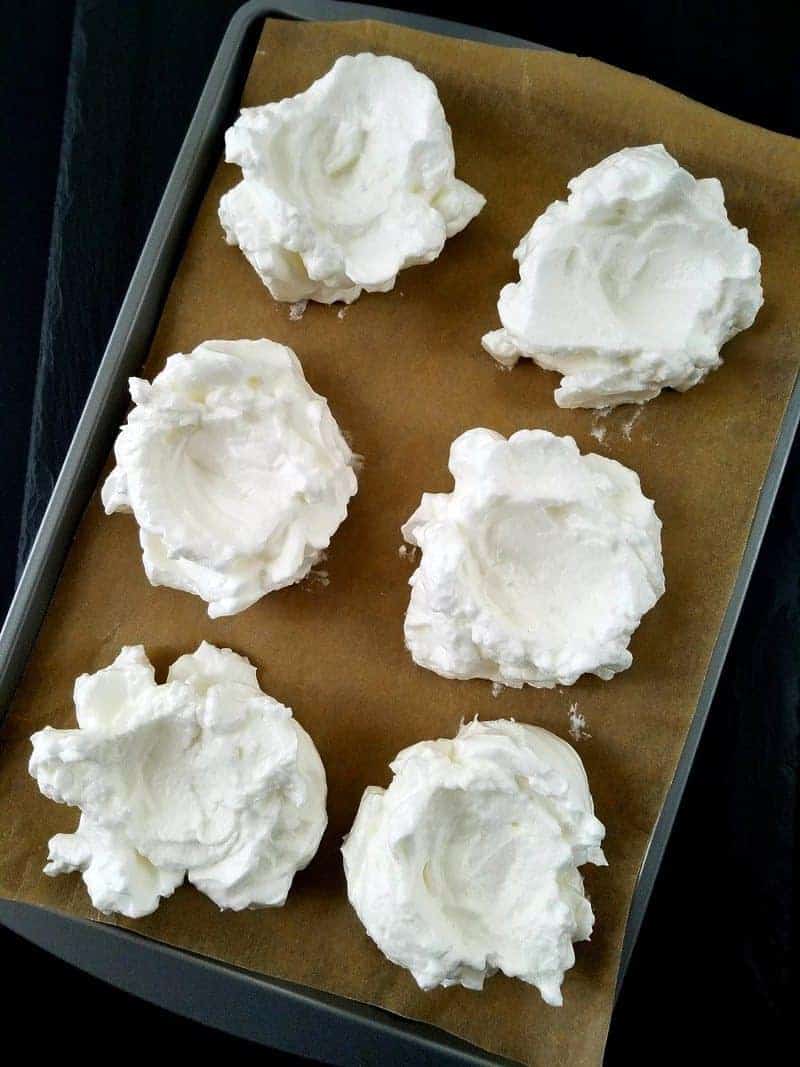
- Mini pavlova (make several mini-size pavlovas instead of the classic family-size)
- Pavlova cake (some are layered)
- Pavlova roll
As for flavor, some of the most common variations are:
- Strawberry pavlova
- Chocolate pavlova
- Lemon pavlova
The classic pavlova base is flavored with one of flavorings listed above.
Storage
After baking the pavlova and letting it cool completely in the oven, store it UNFROSTED (without toppings) in an airtight container at room temperature in the driest room of the house. It must be away from bathrooms and the kitchen where the humidity is higher.
Do NOT store the pavlova in the fridge; otherwise, it will become soggy!
Can I freeze the pavlova?
No, because once you thaw it the outer shell will lose its crispness.
PIN & ENJOY!
FOLLOW US on INSTAGRAM, PINTEREST, and FACEBOOK for more easy and delish recipes and updates.
Pavlova Recipe
Equipment
- Stand mixer with a whisk attachment – I prefer this over a hand mixer.
- Mixer bowl – Copper, metal or glass. Avoid plastic bowls.
- Two spatulas – Avoid wooden spatulas. I like to use one spatula while the meringue is whisking, and the second spatula to transfer the meringue mixture to the parchment paper.
- Baking tray
- Parchment Paper
- Offset spatula
- Clean glass bowls – To help separate egg whites from egg yolks.
- Clean measuring jug (preferably not plastic).
- Blender/food processor – for sugar (only if you’re not using caster sugar).
- Kitchen scale
- Clean hand towels and paper napkins
Ingredients
Classic pavlova base
- 7.8 oz egg whites (from FRESH EGGS) at room temp (about 7 large eggs or 221 g or 225 ml)
- 12.3 oz caster sugar or 350 g (If using granulated sugar, pulse it in the food processor to make it finer)
- 1 tablespoon cornstarch a tightly packed tablespoon (8 -10 g)
- 2 teaspoon white vinegar 10 ml or ¾ teaspoon cream of tartar
- 1 teaspoon grated lemon zest optional (from a dry lemon)
Raspberry Curd
- 4 large eggs at room temperature
- 2 cups granulated sugar
- 2 cups raspberries fresh or frozen
- ½ cup fresh lemon juice
- Zest from one large lemon
- 1 stick unsalted butter or 8 tablespoons, at room temperature and cut into pats
Chocolate Cream
- 20 fl. oz heavy whipping cream chilled (or 600 ml)
- 1 tablespoon pure vanilla extract
- 8 oz thick plain or vanilla Greek yogurt about 250g
- 1 ¼ cups Nutella cup = 240 ml
Toppings
- 8 oz fresh strawberries sliced (or 250g)
- 16 oz fresh raspberries about 500g
- 3 tablespoons shelled pistachios chopped
- 1 small bunch fresh mint leaves
Instructions
- To make the meringue base: Make sure all the equipment (without exception) is clean and dry. Preheat oven to 300°F (150°C). Cut a piece of parchment paper (big enough to line a baking tray). Draw a circle that's 8-inch ( 20 cm) in diameter on the underside of the parchment paper. Line the baking tray with it (the drawn circle must be on the underside). Reserve!
- Gently break an egg, and put the egg white into a small clean bowl. Make sure not to break the egg yolk. Once the egg white is separated, transfer it into a mixer bowl that is on a weighing scale. Repeat with the remaining eggs until you have 7.8 oz (221 g) of egg whites. NOTE: If any egg white gets contaminated by the yolk, discard that egg white and start again with another egg. Keep the egg yolks to make other recipes with them.
- Measure the egg whites and then whisk them on speed on speed 4 (on a 10- speed mixer) until it reaches soft peak stage (you’ll see when you lift the whisk). It will take around 10 minutes!
- Once they reach the soft peak stage, lower the speed to 3 and add the sugar (1 - 2 tablespoon at a time only), waiting about 30 seconds before each addition. In addition, scrape down the sides of the bowl at least once, while adding the sugar. It will take about 15-20 minutes to add and whisk all the sugar. Make sure each addition of sugar is dissolved before adding the next. You don’t want to have a weeping pavlova!
- After adding all the sugar, increase the speed to 4 and whisk the egg white mixture until it is glossy and thick and holds its shape well. But do not overbeat the mixture; otherwise, it will become grainy! TIP: To check if the sugar is dissolved: Take a little meringue to your fingertip and rub it between your thumb and index finger. If you feel any granules, then it needs more time to whisk.
- Next, place the cornstarch and vinegar in a small bowl and mix to combine (it has to be smooth and thick like a slurry).
- As soon as the meringue is glossy and thick, add the cornstarch and vinegar slurry. Then increase the speed to about 5 - 6 and whisk the slurry into the egg whites for about 30 - 45 seconds. Now stop whisking!
- Using another clean spatula, scoop the meringue out of the bowl onto the parchment paper with the drawn circle. Pile the meringue in the middle of the drawn circle.
- Using an offset spatula, spread the meringue to fill the drawn circle on the parchment paper. The meringue must be evenly tall.
- Then create furrows along the sides of the pavlova, going from bottom to top using the offset spatula. Smooth the edges to get rid of meringue points (they burn easily). It has to have soft, rounded edges. Create some swirls on the middle of the meringue on top. The center should be lower than the top edges to accommodate the whipped cream after baking and cooling.
- Transfer the pavlova to the middle rack of the oven and immediately reduce the temperature to 225°F (110°C).
- Bake for 90 minutes. NOTE: Do NOT open the oven door during this time. When the time comes to an end, turn off the oven and let the pavlova cool completely in the oven (or up to 6 hours).
- Transfer the pavlova to an airtight container and store at room temp in a cool dry place (free of draft), until ready to serve. Do NOT store in the fridge or freezer (or it will be soggy). Only top the pavlova with the chocolate cream, curd, and fruits right before serving.
- For the Curd: While the pavlova is baking, let’s make the curd. In a bowl, whisk together sugar and eggs until homogeneous. Set aside!
- In a medium saucepan, over medium-low heat, add raspberries, lemon juice, and lemon zest. Cook until the berries start to break down (around 5 minutes). Stir and ensure the mixture doesn’t burn.
- Add in the egg/sugar mixture and constantly whisk for 2 minutes, or until it begins to thicken (about 5 minutes). Add butter and continue stirring often until the butter is melted. Over a bowl, use a strainer to press the solids out of the mixture.
- Refrigerate the smooth mixture or curd until cold (for at least 4 hours). Refrigerate leftovers in an airtight container for up to 10 days.
- For the Chocolate Cream: Whip the cream and vanilla on a low to medium speed or by hand until stiff peaks form. Ensure the cream stays smooth and doesn’t curdle.
- Whisk in the Nutella with the yogurt until homogeneous. Gently fold the Nutella/yogurt mixture into the whipped cream until homogeneous.
- To Assemble: Right before serving, dollop the chocolate cream over the baked and cool pavlova. Top with the curd and make some swirls on the edges to drip the curd on the sides.
- Then garnish the top with fresh berries, pistachio, and mint. Enjoy!
Recipe Notes
Nutrition
** Nutrition labels on easyanddelish.com are for educational purposes only. This info is provided as a courtesy and is only an estimate, since the nutrition content of recipes can vary based on ingredient brand or source, portion sizes, recipe changes/variations, and other factors. We suggest making your own calculations using your preferred calculator, based on which ingredients you use, or consulting with a registered dietitian to determine nutritional values more precisely.
Please note that health-focused and diet information provided on easyanddelish.com is for educational purposes and does not constitute medical advice, nor is it intended to diagnose, treat, cure, or prevent disease. Consult with your doctor or other qualified health professional prior to initiating any significant change in your diet or exercise regimen, or for any other issue necessitating medical advice.


John / Kitchen Riffs says
Love pavlova -- one of those dishes we make several times a year. Yours looks great, and terrific tips! Thanks.
Raymund says
Great tipe Denise, really helpful specially for me living in the land where pavlova had started