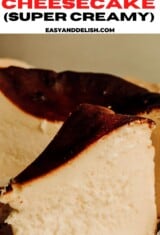
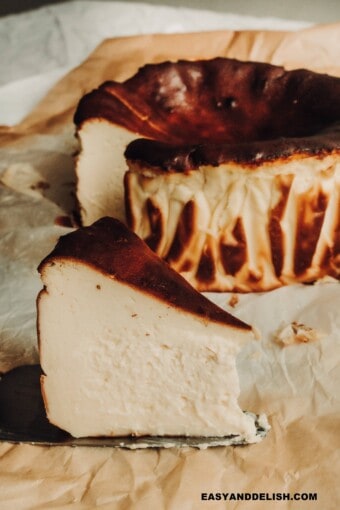
Basque Burnt Cheesecake has a charred top and a soft, creamy interior that melts in your mouth. It is rustic, with a complex aroma that recalls browned butter. Simply one of those easy desserts that you will want to make and eat again and again.
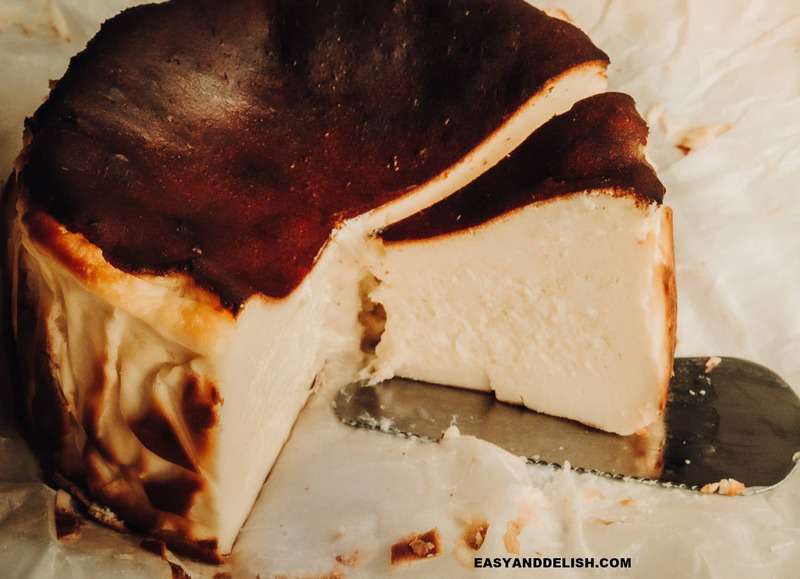
Have you ever tried the famous Basque cheesecake? If not, you’re missing out!
It quickly has become one of my favorite desserts. It is super creamy and so easy to make. Plus, you can serve it all year round.
A warning: It will be love at first bite!
Table of Contents
What Is Basque Burnt Cheesecake?
Also known as Basque Cheesecake or Burnt Cheesecake, this baked dessert was created in 1990 by chef Santiago Rivera of the restaurant La Viña in San Sebastian, Spain. With some differences from its famous counterpart in America, this Spanish version has some characteristics all its own:
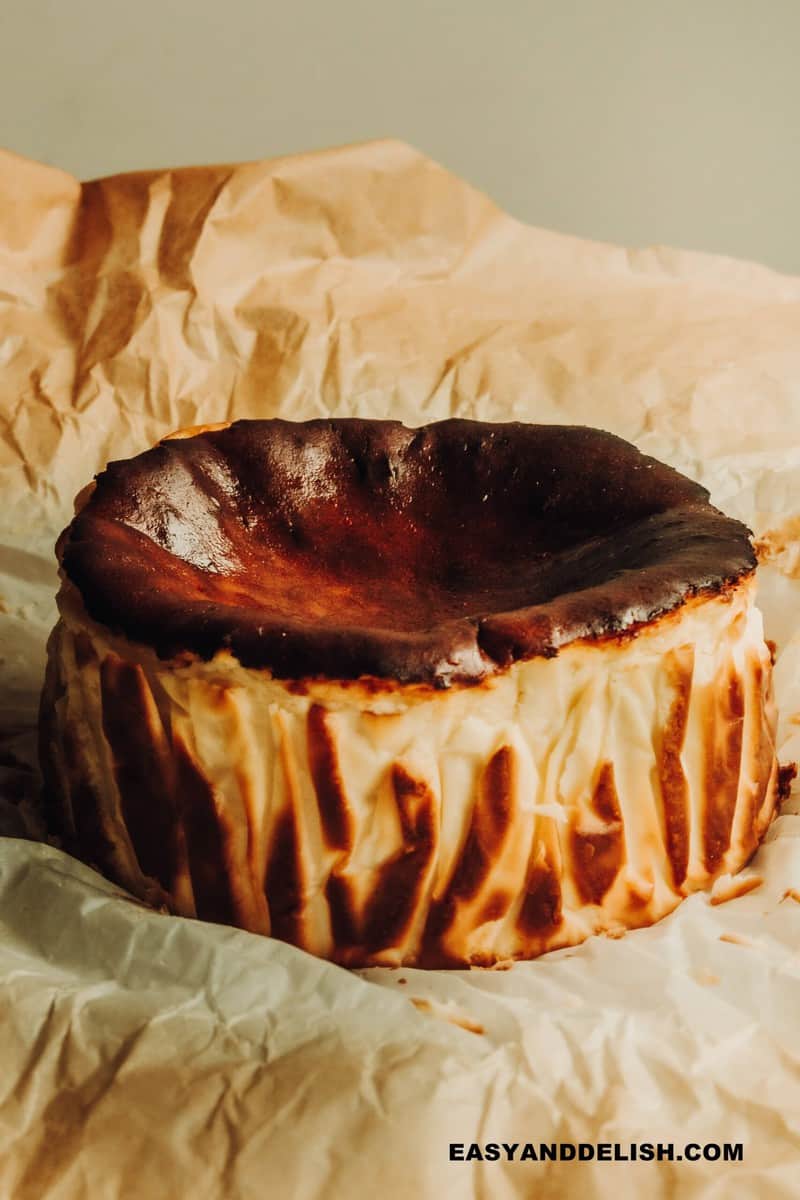
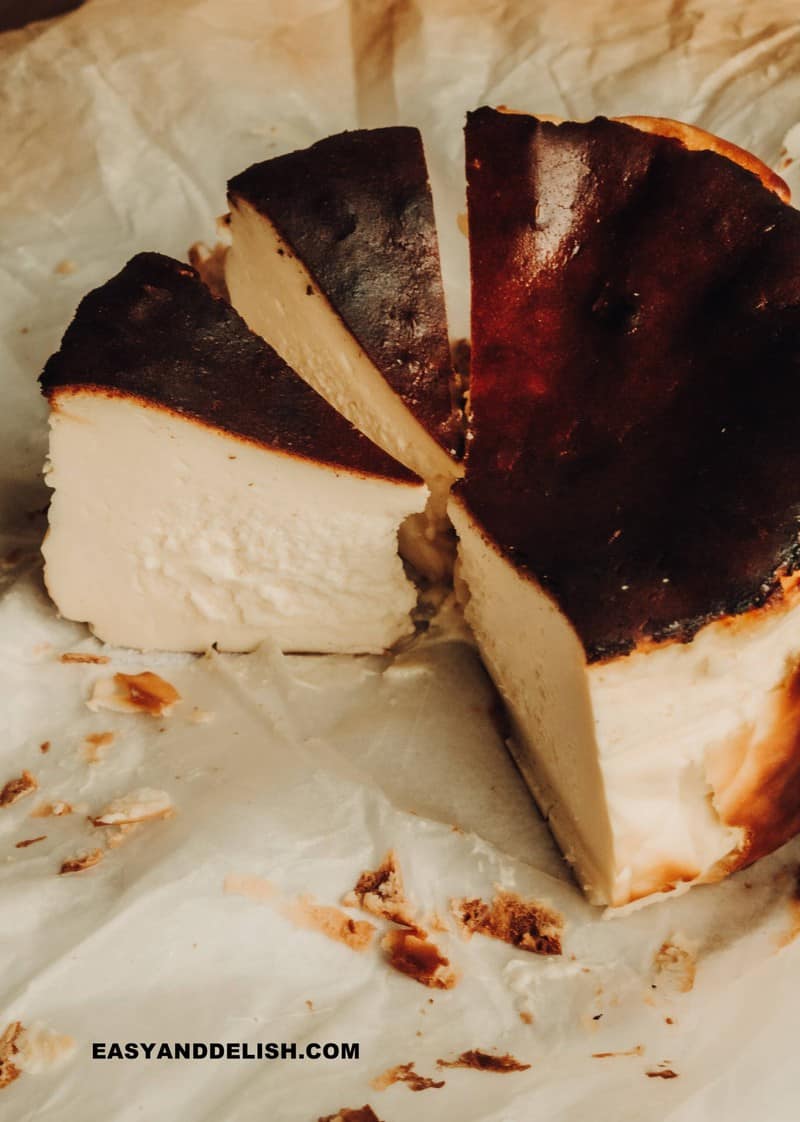
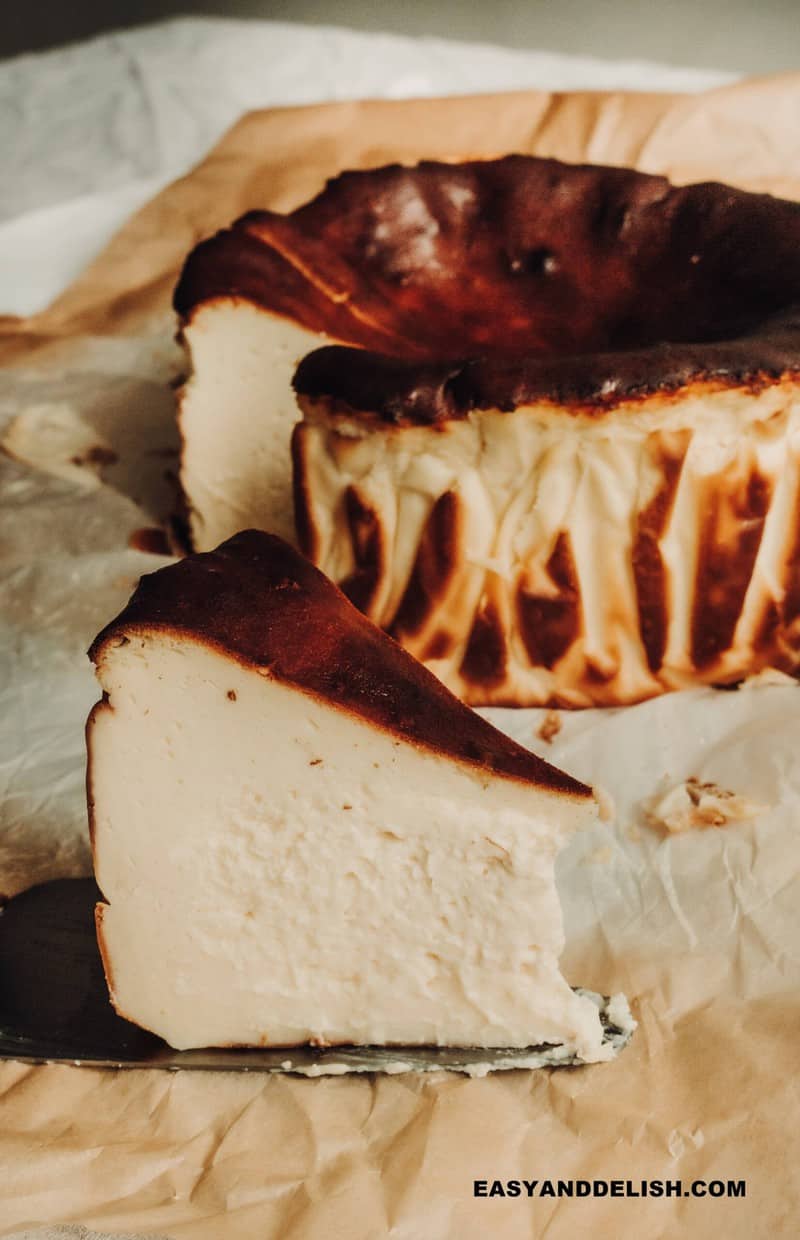
- Appearance: It has a “burnt,” charred, or caramelized top because it is baked at high temperatures (usually over 400° F or 200° C), while a regular cheesecake is baked at 325°-350° F (160-180°C). It is often taller, with a caved-in center, and also has rough, irregular edges from the parchment paper that lines the baking pan.
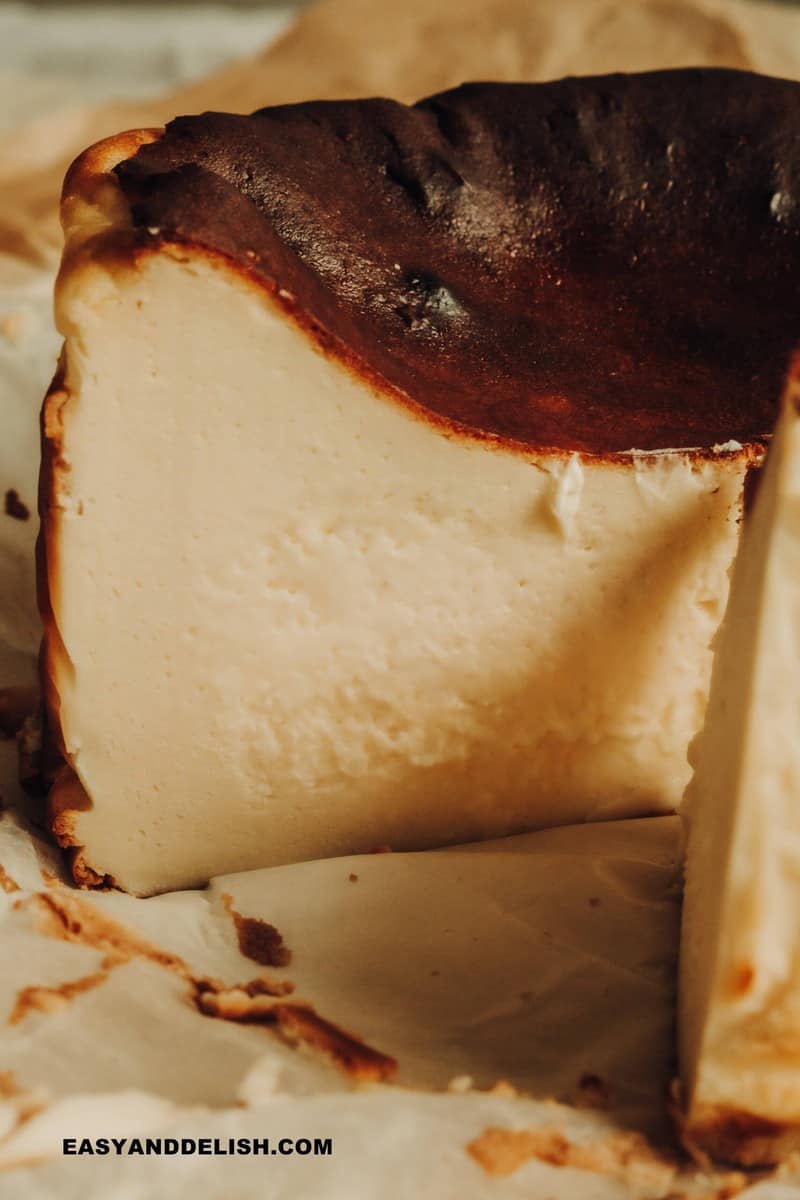
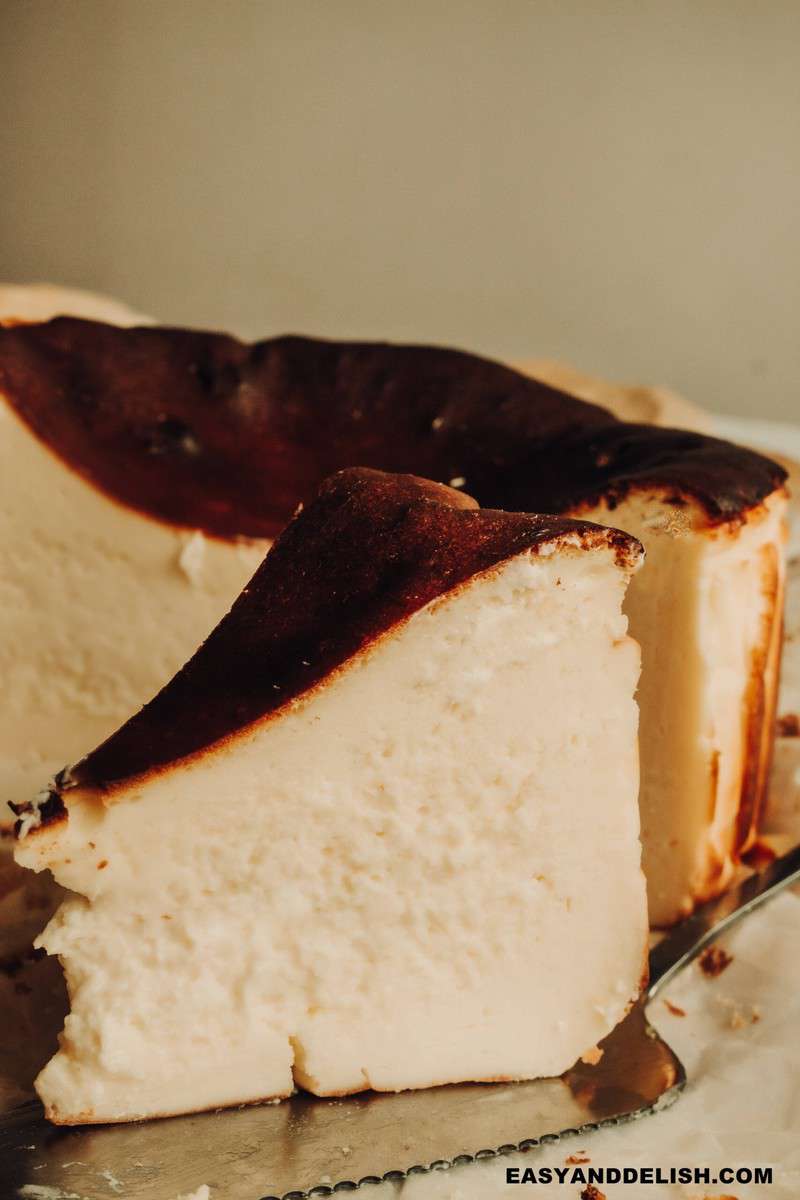
- Texture: Just like a flan, it tends to be creamy in the middle and firmer on the outside. Depending on how long you bake it, it can have one of three different textures: Firm (baked longer), creamy (baked at a normal time), or “raw” (slightly underbaked). In addition, it is crustless -- unlike an American cheesecake.
- Flavor: It tastes like a caramelized cheesecake with a balance of bitterness from its burnt exterior and mild sweetness from the creamy custardy interior.
- Level of Difficulty: It is easy to prepare. It has no crust! Basically, you just have to mix ingredients in a mixer, line the baking pan with parchment paper, bake the Basque Burnt Cheesecake, and let it cook and/or chill. There is no topping needed to serve it with!
- Baking time: It takes about half the baking time (around 30-35 minutes) compared to a regular cheesecake (55-70 minutes) since it bakes at a higher temperature. It has to have a dark top and a jiggly center.
Ingredients and Substitutions
Most Basque cheesecake recipes list the same ingredients but with slightly different ratios. Ours requires the following:
- Cream cheese (full-fat for a dense, creamy cheesecake. Please do not use reduced-fat or whipped cream cheese)
- Sugar (white granulated sugar)
- Eggs (Use large eggs -- each weighs about 50 g without shell)
- Heavy whipping cream (this contains around 36-38% fat)
- Flour (although you can use all-purpose flour, I used cake flour for a lighter or more delicate texture) and cornstarch.
- Flavorings: We used pure vanilla extract, lemon juice, and salt. Some also add lemon rind, and others replace the vanilla extract with vanilla bean, which is more expensive, but which also makes this burnt cheesecake even more delicious.
The cream cheese, eggs, and heavy cream must be at room temperature in order to mix well with the other ingredients and become smooth instead of lumpy!
How to Make Basque Burnt Cheesecake
As you can see, the process is quite easy. Just follow these steps for our Basque cheesecake recipe:
STEP 1 -- Preheat the Oven:
The temperature will depend on which type of oven you have. Pay close attention because this is crucial for a burnt top and perfectly baked cheesecake.
- For a CONVECTION OVEN WITH A FAN: Preheat at 450ºF (230ºC) and place the cheesecake on the middle rack because the fan helps to circulate the hot air).
- FOR A CONVENTIONAL OVEN (NO FAN): Preheat at 475ºF (245ºC) and bake the cheesecake on a rack slightly higher than the middle one. But still make sure to leave space between the rack and the top of the oven because a 3-inch deep cake pan needs extra space for rising.
NOTE: If your oven doesn’t get very hot, you can preheat to the hottest oven temperature (550ºF or 290ºC) for 30-60 minutes before baking our Basque cheesecake.
STEP 2 -- Prepare the Cake Pan:
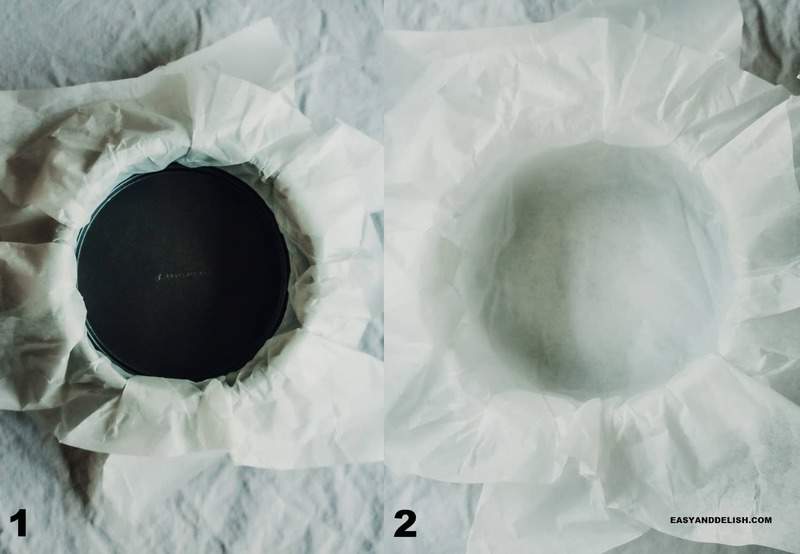
Line a 6-inch (15 cm) round cheesecake pan (3-inch or 7 cm deep) with 2 large sheets of parchment paper. Make sure to leave at least 2 inches (5 cm) of overhang paper around all edges.
TIP: Fold the parchment paper twice (as if forming a square) to find the center of the paper. Then overlap the 2 sheets to match the cross/center and place both on top of each other in the middle of the pan. The longer sides must be against each other.
At this point, you can either press the paper against the bottom and all around the edges to make it conform to the pan or you can place the removable bottom of the pan on top of the paper sheets and press it down to snugly fit the paper all around the sides and bottom to form a paper “mold.” SEE PIC. 1
Finally, remove that paper “mold,” place the removable bottom back into the cake pan (as it should be), and put the “mold” back into the pan on top of the replaced bottom, pressing down to fit. SEE PIC. 2 Reserve!
STEP 3 -- Make the Batter:
- If the cream cheese is not at room temperature, microwave it at half power (50%) for 45 seconds, at 15 seconds intervals. To start, mix the cream cheese until creamy and soft in a bowl of a stand electric mixer with a paddle attachment. Then add sugar, beating until the mixture becomes fluffy and smooth. You must scrape down both the bowl and paddle to make sure there are no lumps.
- Add the eggs, one at a time, beating each just until fully incorporated. If the eggs are not at room temperature, place them into a lukewarm bowl of water for 5-10 minutes to bring them to room temp before adding them to the cheesecake batter.
- Scrape down the batter again. It must have no lumps! Then go ahead and stir in the lemon juice, vanilla extract, and salt.
- Sift the cake flour and cornstarch together before adding them to the batter. Beat just until you see no more lumps.
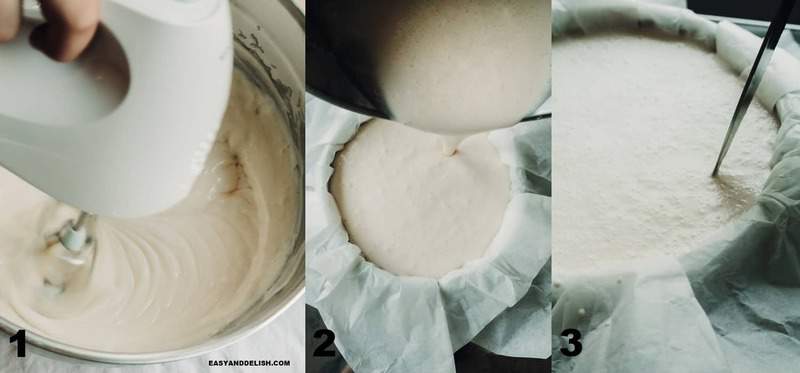
- Gradually beat in the heavy cream (must be at room temp) to fully combine. SEE PIC. 1
- Pour the cheesecake batter into the prepared pan in one go to avoid creating air pockets. SEE PIC. 2 Carefully tap the pan on the countertop a few times and then prick the air bubbles on the surface with a toothpick. SEE PIC. 3
- To avoid spillage and a mess in your oven, place the cheesecake pan on a large baking sheet.
STEP 4 – Bake:
Allow this Basque Burnt Cheesecake to bake for about 30-35 minutes, or until the top is dark amber or brown and the center is still jiggly. Watch it closely because the top starts becoming dark after the 30-minute mark quickly (within the next 5 minutes). But every oven is different!
This is for a cheesecake with a creamy texture. Let it cool completely at room temp and slice. For one with a “cakey”/firmer texture, let it cool and then chill for 24 hours before slicing. For one with a “raw” texture (gooey), bake the cheesecake for a few minutes less than 35 minutes and then chill overnight before serving.
One thing is for sure: NEVER OVERBAKE the cheesecake --even if the top doesn't turn dark. You don’t want a custard with a curdled filling.
STEP 5—Cool:
Let the burnt cheesecake cool completely in the pan on a wire rack (where air can circulate) until it is at room temperature. This takes around 2-3 hours. Never leave it to cool on the countertop directly! Then gently peel back the parchment paper.
STEP 6 – Chill:
You can either serve the cheesecake at room temperature (creamy texture) or chill in the fridge, covered with a cloth (not plastic to not create condensation), for at least 4 hours up to 24 hours.
STEP 7 – Serve:
Either at room temp or chilled, remove the cheesecake from the cake pan and gently peel back the parchment paper. If chilled, let stand at room temperature for at least 30 minutes or up to 2 hours before slicing and serving.
For a cleanly sliced cheesecake, wipe your chef’s knife blade before slicing it again.
Tools to Make Basque Cheesecake
This Basque cheesecake recipe requires 3 tools:
1. 6-inch (15-cm) round cake pan with a removable bottom:
The cake pan must also be around 3-inch deep because the cheesecake batter will rise a lot while baking.
But if you prefer to use a larger pan (8-inch or 9-inch), our recipe will create a short cheesecake with a not-so-luscious texture.
You can multiply the recipe by 1.5 if using a 3-inch deep 7-inch round pan, or multiply the recipe by 2 for a 3-inch deep 8-inch round pan. It’s up to you!
2. Parchment Paper
Use parchment paper (never wax paper). If you use a wide parchment paper, you will only need one sheet. But if using regular paper, you’ll need 2 sheets to cover the shorter side of parchment paper in the pan.
3. Silicone Spatula/Bowl or Electric Mixer
You can make this Basque cheesecake either by hand (using a silicone spatula and a large bowl) or use a stand mixer.
TEXTURES OF THE BURNT CHEESECAKE
Unlike a regular cheesecake, the Basque burnt cheesecake can have one of three different textures, depending on your preference: Firmer (like regular cheesecake), creamy, or creamy with an oozy ‘raw’ center.
Firmer texture:
- Bake at a normal time in the oven (as stated in the recipe).
- Chill in the fridge for more than 4 hours to up to 24 hours. Take out of the fridge 10 minutes prior to serving or serve it cold.
- It will be firm and dense like a regular cheesecake.
Creamy texture (My Favorite):
- Bake at a normal time in the oven (as stated in the recipe).
- Preferably serve at room temperature but if you chill it, take it out 30 minutes before serving.
- A firm cheesecake with a creamy center.
Underbaked or “Raw” texture:
- The cheesecake must be slightly underbaked (a few minutes less than stated in the recipe).
- Chill overnight in order to slice it nicely.
- It will be mostly firm with a super creamy (almost melting) center.
Useful Tips for Making Basque Cheesecake
- Preheat the oven well until is quite hot (at least for 30 minutes).
- Preferably use a convection oven with a fan. If you only have the conventional oven (regular), bring the rack higher than the middle.
- Always line your pan with parchment paper. The parchment paper must never touch the heating element/ceiling of your oven. Unless the paper is wide/large, double line it to ensure the pan is covered with it.
- Use a deep pan because the batter will rise and you don’t want to wind up with a mess to clean afterward.
- Make sure the cream cheese, eggs, and heavy cream are at room temperature in order to blend together easily and create a smooth batter.
- If the cream cheese is cold, microwave with half power (50% power) for 45 seconds, at 15-second intervals. Press the center of the cream cheese to check softness.
- Crack the eggs into another bowl to avoid pieces of the shell falling into the batter. If they are not at room temp, place them into a lukewarm bowl for 5-10 minutes before adding to the batter.
- If you can, preferably use cake flour--it contains less gluten and will produce a lighter texture than all-purpose flour. I typically use cake flour when making cakes. I assume all-purpose flour will be fine. Cornstarch is also added for a lighter and less chewy texture. For a gluten-free cheesecake, replace the flour with rice flour.
- Add lemon juice to brighten the flavor and salt to intensify it.
- Add pure vanilla extract to cut down the eggy taste. If you have a vanilla bean, it will make this Basque cheesecake even more delish.
- To avoid lumps and ensure a smooth texture, blend each ingredient well before adding the next.
- Tap the cheesecake pan filled with the batter a few times on the countertop and also pop the bubbles before baking.
- Place the cake pan into the oven FAST in order to not decrease the oven temperature.
- Watch the cheesecake top closely after the 30-minute mark. It can darken quite quickly.
- Do a test before removing the pan out of the oven completely. Wobble the pan. The cheesecake must be set yet jiggly in the middle.
- NEVER overcook or overbake the cheesecake (even if the top doesn’t turn dark after 30-35 minutes). It will be curdled instead of smooth. There is no fix for that!
- Let the cheesecake cool completely on a rack (air must circulate under) before chilling.
- As it cools, the center will sink down.
- Serve it at room temperature (creamy) or chill and take out 10 minutes before serving for a firm filling.
- To slice it clean, warm a knife with hot water. Fill a tall mug with boiling water, dunk the knife in, and wipe quickly every time you slice the cheesecake.
Frequent Asked Questions
What can I do to get the top to burn nicely?
- Preferably use the convection oven (with a fan).
- Preheat the oven for at least 30 minutes.
- Bake at a higher temperature.
- Bake on a higher rack (it is hotter) but the parchment paper cannot touch the heating element/oven ceiling.
Can I use a bigger cake pan size?
Yes, but to get a tall cheesecake with a creamy texture, multiply the recipe by 1.5 if using a 3-inch deep 7-inch round pan, or multiply the recipe by 2 for a 3-inch deep 8-inch round pan. You may have to bake the cheesecake for longer.
My Basque cheesecake cracks on top. What can I do to avoid that?
A stand mixer seems to create more air bubbles, making the batter rise higher and unevenly, and then collapse and form cracks. Try to tap the cake pan the counter, pop the air bubbles with a toothpick, and rest the batter a bit before baking.
However, the best way to avoid that is to mix the batter by hand with a spatula.
How can I achieve a smooth, shiny surface (without dark bubbles)?
This usually happens when the cake batter had bubbles before baking.
Why does my Basque cheesecake have a gooey, raw texture in the middle?
This happens when the cheesecake is undercooked or underbaked. Chilling before serving will not fix the texture. But don’t worry! It is still safe to eat. Next time, bake the cheesecake for longer.
Storage
Store this Basque burnt cheesecake, covered, in the fridge for up to 3 days. Do not freeze!
Other desserts to try:
- Chocolate Cheesecake Tart
- Almond Cherry Cheesecake
- Lemon Pudding Cake
- Chocolate Cheesecake Bars
PIN & ENJOY!
FOLLOW US on INSTAGRAM, PINTEREST, and FACEBOOK for more easy and delish recipes and updates.
Basque Burnt Cheesecake
Equipment
- oven
- Baking pans
- mixer
Ingredients
- 16 oz cream cheese or 454 grams at room temperature; I used Philadelphia brand
- ½ cup sugar or 100 grams
- 3 large eggs 50 g each without a shell; at room temperature
- 2 Tablespoons cake flour or you can use all-purpose instead, but the cake won’t be as light in texture
- 2 teaspoons cornstarch
- 1 cup heavy whipping cream 36-38% fat; at room temperature
- 1 Tablespoon fresh lemon juice
- 1 teaspoon pure vanilla extract
- ¼ teaspoon salt
Instructions
STEP 1 -- Preheat the Oven:
- The temperature will depend on what type of oven you have. Pay close attention because this is crucial for a burnt top and perfectly baked cheesecake. For a CONVECTION OVEN WITH FAN: Preheat at 450ºF (230ºC) and place the cheesecake on the middle rack because the fan helps to circulate the hot air). FOR A CONVENTIONAL OVEN (NO FAN): Preheat at 475ºF (245ºC) and bake the cheesecake on a rack slightly higher than the middle one. But still make sure to leave space between the rack and the top of the oven because a 3-inch deep cake pan needs extra space for rising. NOTE: If your oven doesn’t get very hot, you can preheat to the hottest oven temperature (550ºF or 290ºC) for 30-60 minutes before baking our Basque cheesecake.
STEP 2 -- Prepare the Cake Pan:
- Line a 6-inch (15 cm) round cheesecake pan (3-inch or 7 cm deep) with 2 large sheets of parchment paper. Make sure to leave at least 2 inches (5 cm) of overhang paper around all edges. TIP: Fold the parchment paper in half twice (lengthwise and crosswise, forming a square) to find the center of the paper. Then overlap the 2 sheets to match the cross/center point and place both sheets, one on top of the other, in the middle of the pan. The longer side must be against each other. At this point, you can either press the paper against the bottom and all around the edges to make it conform to the pan or you can place the removable bottom of the pan on top of the paper sheets and press it down to snugly fit the paper all around the sides and bottom to form a paper “mold.” Finally, remove that paper “mold,” place the removable bottom back into the cake pan (as it should be), and put the “mold” back into the pan on top of the replaced bottom, pressing down to fit. Reserve!
STEP 3 -- Make the Batter:
- If the cream cheese is not at room temperature, microwave it at half power (50%) for 45 seconds, at 15 seconds intervals. To start, mix the cream cheese until creamy and soft in a bowl of a stand electric mixer with a paddle attachment. Then add sugar, beating until the mixture becomes fluffy and smooth. You must scrape down both the bowl and paddle to make sure there are no lumps.
- Add the eggs, one at a time, beating each just until fully incorporated. If the eggs are not at room temperature, place them into a lukewarm bowl of water for 5-10 minutes to bring them to room temp before adding them to the cheesecake batter.
- Scrape down the batter again. It must have no lumps! Then go ahead and stir in the lemon juice, vanilla extract, and salt.
- Sift the cake flour and cornstarch together before adding them to the batter. Beat just until you see no more lumps.
- Gradually beat in the heavy cream (must be at room temp) to fully combine.
- Pour the cheesecake batter into the prepared pan in one go in order to avoid creating air pockets. Carefully tap the pan on the countertop a few times and then pop the air bubbles on the surface with a toothpick.
- To avoid spillage and a mess in your oven, place the cheesecake pan on a large baking sheet.
STEP 4 – Bake:
- Allow this Basque Burnt Cheesecake to bake for about 30-35 minutes, or until the top is dark amber or brown and the center is still jiggly. Watch it closely because the top starts becoming dark after the 30-minute mark quickly (within the next 5 minutes). But every oven is different! This is for a cheesecake with a creamy texture. Let it cool completely at room temp and slice. For one with a “cakey”/firmer texture, let it cool and then chill for 24 hours before slicing. For one with a “raw” texture (gooey), bake the cheesecake for a few minutes less than 35 minutes and then chill overnight before serving. One thing is for sure: NEVER OVERBAKE the cheesecake --even if the top doesn't turn dark. You don’t want a custard with a curdled filling.
STEP 5—Cool:
- Let the burnt cheesecake cool completely in the pan on a wire rack (where air can circulate) until it is at room temperature. This takes around 2-3 hours. Never leave it to cool on the countertop directly!
STEP 6 – Chill:
- You can either serve the cheesecake at room temperature (creamy texture) or chill in the fridge, covered with a cloth (not plastic, in order to not create condensation), for at least 4 hours and up to 24 hours.
STEP 7 – Serve:
- Either at room temp or chilled, remove the cheesecake from the cake pan and gently peel back the parchment paper. If chilled, let stand at room temperature for at least 30 minutes or up to 2 hours before slicing and serving. For a cleanly sliced cheesecake, wipe your chef’s knife blade before slicing it again.
Recipe Video

Recipe Notes
- Preheat the oven well until is quite hot (at least for 30 minutes).
- Preferably use a convection oven with a fan. If you only have a conventional oven (regular), bring the rack higher than the middle.
- Always line your pan with parchment paper. The parchment paper must never touch the heating element/ceiling of your oven. Unless the paper is wide/large, double line it to ensure the pan is covered with it.
- Use a deep pan because the batter will rise and you don’t want to wind up with a mess to clean afterward.
- Make sure the cream cheese, eggs, and heavy cream are at room temperature in order to blend together easily and create a smooth batter.
- If the cream cheese is cold, microwave with half power (50% power) for 45 seconds, at 15-second intervals. Press the center of the cream cheese to check softness.
- Crack the eggs into another bowl to avoid pieces of the shell falling into the batter. If they are not at room temp, place them into a lukewarm bowl for 5-10 minutes before adding to the batter.
- If you can, prefer cake flour (it contains less gluten) and will produce a lighter texture than all-purpose flour. and I typically use cake flour when making cakes. I assume all-purpose flour will be fine. Cornstarch is also added for a lighter and less chewy texture. For a gluten-free cheesecake, replace the flour with rice flour.
- Add lemon juice to brighten the flavor and salt to intensify it.
- Add pure vanilla extract to cut down the eggy taste. If you have a vanilla bean, it’ll make this cheesecake even more delish.
- To avoid lumps and ensure a smooth texture, blend each ingredient well before adding the next.
- Tap the cheesecake pan filled with the batter a few times on the countertop and also pop the bubbles before baking.
- Place the cake pan into the oven FAST in order to not decrease the oven temperature.
- Watch the cheesecake top closely after the 30-minute mark. It can darken quite quickly.
- Make a test before removing the pan out of the oven completely. Wobble the pan. The cheesecake must be set yet jiggly in the middle.
- NEVER overcook or overbake the cheesecake (even if the top doesn’t turn dark after 30-35 minutes). It will be curdled instead of smooth. There is no fix for that!
- Let the cheesecake cool completely on a rack (air must circulate under) before chilling.
- As it cools, the center will sink down.
- Serve it at room temperature (creamy) or chill and take out 10 minutes before serving for a firm filling.
- To slice it clean, warm a knife with hot water. Fill a tall mug with boiling water, dunk the knife in, and wipe quickly every time you slice the cheesecake.
Nutrition
** Nutrition labels on easyanddelish.com are for educational purposes only. This info is provided as a courtesy and is only an estimate, since the nutrition content of recipes can vary based on ingredient brand or source, portion sizes, recipe changes/variations, and other factors. We suggest making your own calculations using your preferred calculator, based on which ingredients you use, or consulting with a registered dietitian to determine nutritional values more precisely.
Please note that health-focused and diet information provided on easyanddelish.com is for educational purposes and does not constitute medical advice, nor is it intended to diagnose, treat, cure, or prevent disease. Consult with your doctor or other qualified health professional prior to initiating any significant change in your diet or exercise regimen, or for any other issue necessitating medical advice.


Autumn Brooke says
This one is completely new to me but definitely looks like one worth trying!
2pots2cook says
So tasty cake !!! Your version is absolutely great !!!!